No-Bake Chocolate Trifle With Whipped Cream
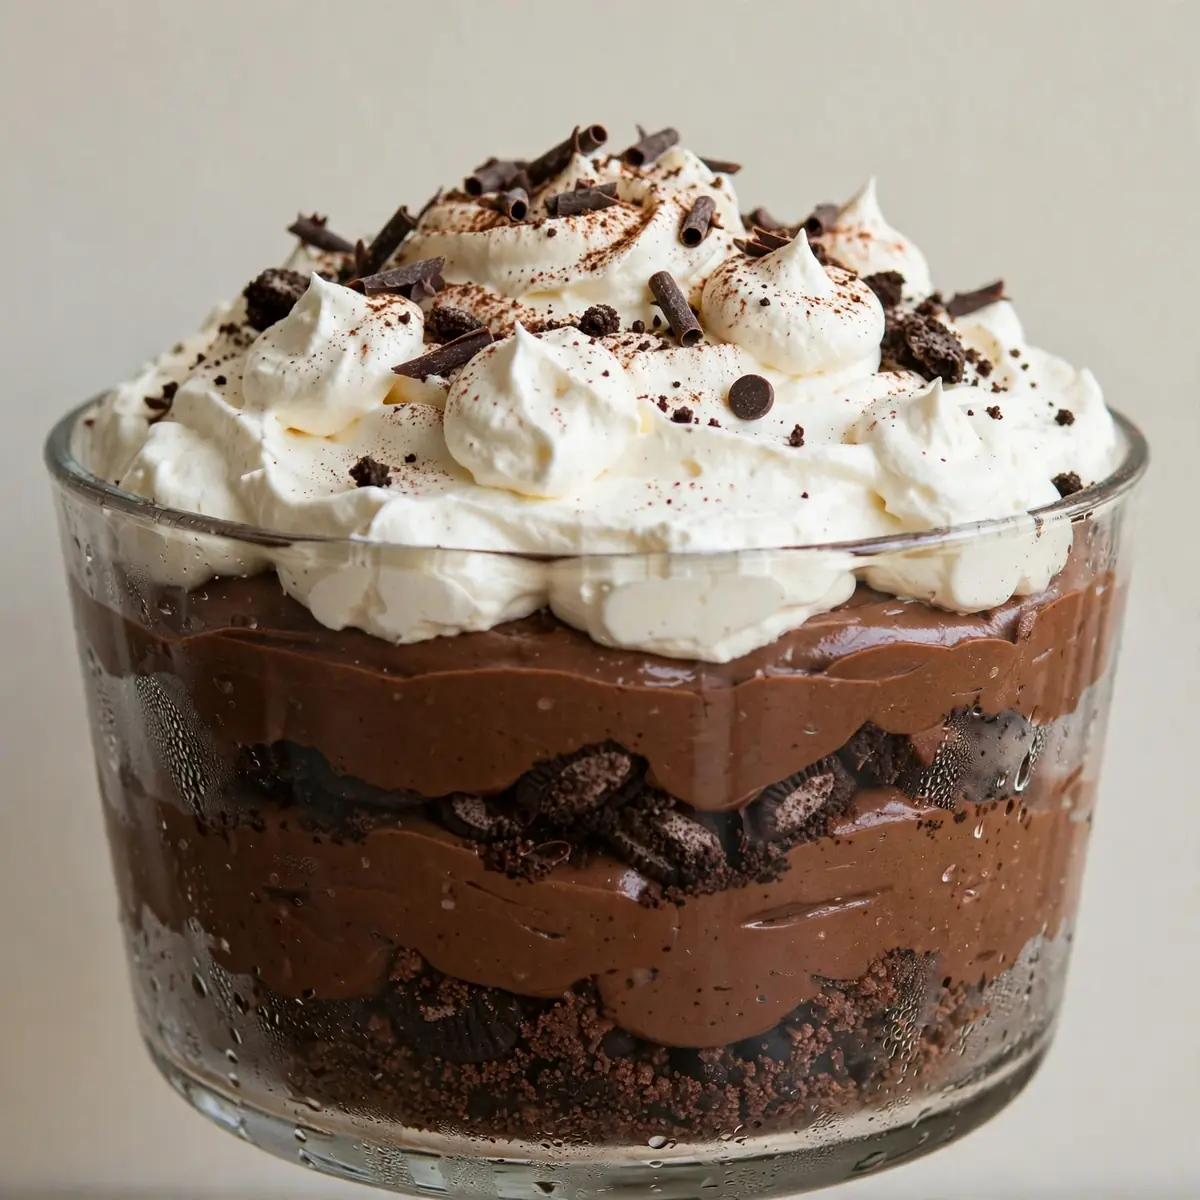
Some evenings call for a proper pudding without the hassle of turning on the oven, and this No-Bake Chocolate Trifle with Whipped Cream has become our family’s weekday secret weapon. After testing this recipe five times, I finally got it just right — a creamy, layered dessert that comes together in the time it takes the kids to finish their homework.
Recipe Overview
- Prep time: 15 minutes
- Cook time: 0 minutes (no baking required)
- Chill time: 1 hour (or up to 24 hours for make-ahead)
- Total time: 1 hour 15 minutes
- Servings: 8 generous portions
- Difficulty: Easy — suitable for novice cooks
Why You’ll Love This No-Bake Chocolate Trifle with Whipped Cream
- No oven needed: On warm evenings or when the oven is already occupied, this dessert sidesteps heat entirely — the hob is the hottest thing you’ll touch.
- Minimal washing up: One mixing bowl, a whisk, and the serving dish are all that get dirty. I make this at least once a week — it’s become a family favourite for that reason alone.
- Make-ahead magic: Assemble it the night before, pop it in the fridge, and pull it out when you’re ready. The flavours meld beautifully overnight.
- Pantry-friendly ingredients: Most items are staples — chocolate, biscuits, cream, and milk. No special trips to the shops required.
- Kid-approved assembly: Children love layering the components. My youngest calls it ‘the pudding that builds itself’.
Ingredients You’ll Need
- 400g digestive biscuits (or plain tea biscuits)
- 200g dark chocolate (70% cocoa), roughly chopped
- 100g milk chocolate, roughly chopped
- 600ml double cream, cold
- 300ml whole milk
- 80g caster sugar
- 3 tablespoons cocoa powder, sifted
- 2 teaspoons vanilla extract
- 50g unsalted butter, cubed
- 1 tablespoon cornflour
- Pinch of sea salt
- Fresh raspberries or strawberries, for garnish (optional)
Tip: For the richest flavour, use a good-quality dark chocolate — it makes a noticeable difference to the final taste. If your biscuits are very sweet, reduce the sugar by 10g.
How to Make No-Bake Chocolate Trifle with Whipped Cream
- Prepare the chocolate base: Place the chopped dark chocolate, milk chocolate, cubed butter, and a pinch of salt in a large heatproof bowl. Pour 200ml of the milk into a small saucepan and warm over medium heat until it just begins to steam — you’ll see tiny bubbles forming around the edges, and the smell will turn warm and milky. Pour the hot milk over the chocolate mixture and let it sit for 2 minutes without stirring. The chocolate should look glossy and begin to soften around the edges.
- Make the chocolate sauce: Whisk the chocolate and milk together until smooth and silky — the mixture will turn a deep, rich brown and smell intensely chocolatey. In a separate small bowl, whisk the cornflour with 2 tablespoons of cold milk until no lumps remain. Pour this slurry into the chocolate mixture, then stir over a low heat for 2–3 minutes until the sauce thickens enough to coat the back of a spoon. It should feel heavy and look like thick pouring custard. Remove from the heat and stir in 1 teaspoon of vanilla extract. Set aside to cool for 10 minutes — it will continue to thicken as it sits.
- Whip the cream: Pour the cold double cream into a chilled mixing bowl (a metal bowl straight from the fridge works brilliantly). Add the remaining 1 teaspoon of vanilla extract and the caster sugar. Whisk by hand or with an electric mixer until soft peaks form — when you lift the whisk, the cream should hold a gentle curl that flops over slightly. Be careful not to overwhip; if the cream turns grainy and looks like butter, you’ve gone too far. Stop at the soft peak stage for the lightest texture.
- Layer the biscuits: Break the digestive biscuits into rough chunks — some should be the size of a 50p coin, others smaller crumbs. Spread a third of the broken biscuits across the bottom of a 9×13 inch baking dish or a large glass trifle bowl. The layer should be even but not tightly packed — you want gaps for the chocolate to seep through.
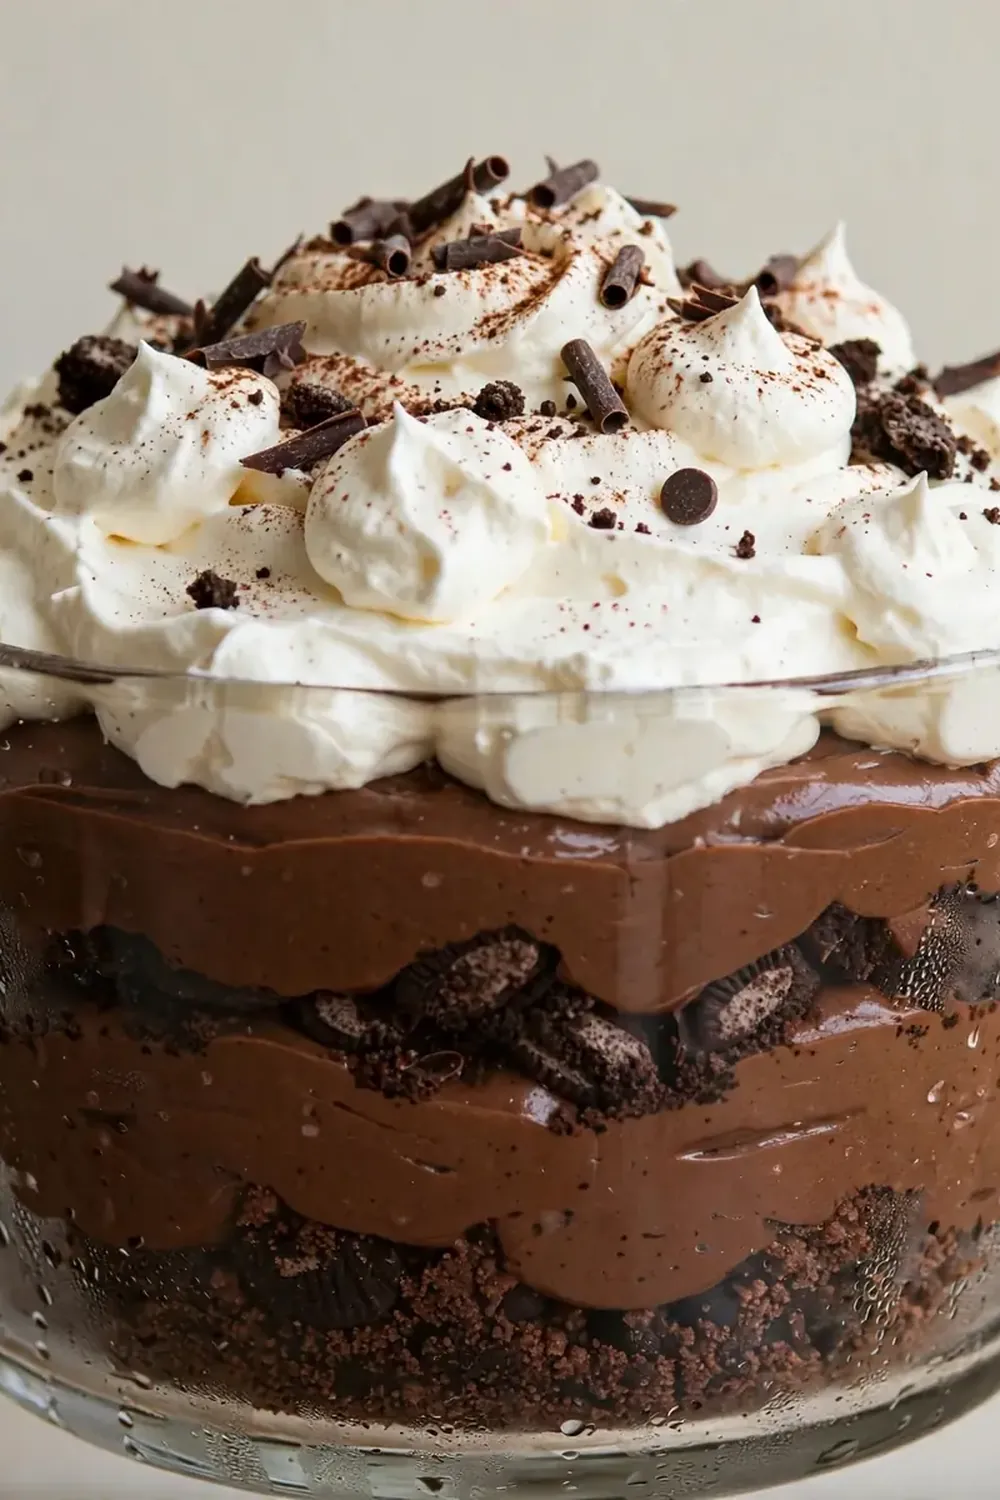
- Add the chocolate layer: Pour half of the cooled chocolate sauce over the biscuit layer. Use a spatula to spread it gently, ensuring it drips down between the biscuit pieces. You’ll see the chocolate pooling in the gaps while the biscuits stay visible — this creates the lovely marbled effect later.
- Add the cream layer: Spoon half of the whipped cream over the chocolate layer and spread it evenly with the back of the spoon. The cream should sit in a smooth, white blanket that contrasts with the dark chocolate beneath. Repeat the layering: remaining biscuits, remaining chocolate sauce, and finally the remaining whipped cream on top.
- Finish and chill: Smooth the top layer of cream with a spatula until it’s even and slightly swirled. If using fresh berries, scatter them over the top now — they’ll sink slightly into the cream as it sets. Cover the dish tightly with aluminium foil and refrigerate for at least 1 hour, though 2–3 hours is better. The finished trifle should feel firm when you gently shake the dish, and the biscuits will have softened into a cake-like texture. Serve chilled.
Tips From My Kitchen
- Chill your cream and bowl: Double cream whips best when everything is properly cold. Pop your mixing bowl and whisk in the fridge for 15 minutes before you start — the cream will whip faster and hold its shape longer, giving you a lighter, airier trifle.
- Don’t skip the cooling step: If you pour hot chocolate sauce directly onto the biscuits, they’ll turn to mush rather than softening into a pleasant, cake-like texture. Let the sauce cool for at least 10 minutes until it’s warm but not hot — test it with a clean finger; it should feel like bathwater, not tea.
- Biscuit size matters: Break the biscuits into varied pieces — some large chunks for texture, some smaller crumbs for structure. Uniformly small pieces will dissolve too quickly, while huge chunks remain too hard. Aim for a mix of sizes, like a rubble pile.
- Make it ahead for best flavour: This trifle actually improves after 12–24 hours in the fridge. The biscuits soften fully, the chocolate sauce seeps into every layer, and the flavours deepen. Assemble it the night before a busy weekday and you’ll have dessert ready with zero effort at serving time.
- Quick cleanup tip: Line your mixing bowl with a reusable silicone mat or a sheet of baking parchment before adding the chocolate. When you’re done, lift the mat out and rinse the bowl — almost no sticky residue remains. For the cream bowl, a splash of cold water and a drop of washing-up liquid before washing prevents the fat from clinging.
- Adjust the sweetness: The sweetness of your biscuits affects the whole dessert. If you’re using very sweet digestives, reduce the caster sugar in the cream by 10–15g. Taste the cream before layering — it should be sweet but not cloying, as the chocolate adds its own sugar.
Equipment You’ll Need
- 9×13 inch baking dish or large glass trifle bowl
- Aluminium foil
- Large mixing bowl (preferably metal for chilling)
- Small mixing bowl
- Sharp knife
- Whisk (hand or electric)
- Spatula
- Saucepan
Common Mistakes to Avoid
- Overwhipping the cream: If you whip the cream until it’s stiff and dry, it will feel heavy and slightly greasy in the finished trifle. Stop at soft peaks — when the cream holds its shape but still looks luscious and billowy. If you accidentally overwhip, fold in a tablespoon of fresh cold cream to loosen it slightly.
- Wrong temperature for the sauce: Pouring the chocolate sauce while it’s piping hot will turn your biscuit layer into a soggy, paste-like mess. Conversely, if the sauce is too cold, it won’t seep into the biscuit gaps properly. Aim for warm but not hot — about the temperature of a warm shower.
- Skipping the rest time: Serving the trifle straight after assembly means crunchy biscuits, runny layers, and separate flavours. The resting time allows the biscuits to soften, the cream to set, and the chocolate to meld with everything. At least 1 hour is non-negotiable; 2–3 hours is far better.
- Using poor-quality chocolate: Cheap chocolate often contains additives that prevent it from melting smoothly, leaving a gritty texture. Invest in a bar with at least 50% cocoa solids for the chocolate layer — it melts into a velvety sauce that makes the whole dish feel luxurious.
- Overloading the dish: A trifle needs room for the layers to settle and the cream to spread. If you cram the dish to the brim, the top layer will spill when you add the foil. Leave about 1cm of space at the top of the dish for the cream to sit comfortably.
What to Serve With No-Bake Chocolate Trifle with Whipped Cream
- A handful of fresh raspberries or strawberries on the side — their tartness cuts through the richness beautifully.
- A simple cup of strong black coffee or a milky tea — the bitterness balances the sweet chocolate.
- For a more substantial dessert spread, pair it with a slice of Moist Zucchini Chocolate Chip Cake for a double-chocolate treat.
- A light Refreshing Peach Sorbet Dessert on the side offers a fruity contrast if you want variety.
Still hungry for ideas? You might also love No Bake Protein Energy Balls, Boston Cream Donuts With Chocolate Frosting from our sister kitchens.
Frequently Asked Questions
No-Bake Chocolate Trifle with Whipped Cream
Ingredients
Method
-
Prepare the chocolate base: Place the chopped dark chocolate, milk chocolate, cubed butter, and a pinch of salt in a large heatproof bowl. Pour 200ml of the milk into a small saucepan and warm over medium heat until it just begins to steam — you’ll see tiny bubbles forming around the edges, and the smell will turn warm and milky. Pour the hot milk over the chocolate mixture and let it sit for 2 minutes without stirring. The chocolate should look glossy and begin to soften around the edges.
-
Make the chocolate sauce: Whisk the chocolate and milk together until smooth and silky — the mixture will turn a deep, rich brown and smell intensely chocolatey. In a separate small bowl, whisk the cornflour with 2 tablespoons of cold milk until no lumps remain. Pour this slurry into the chocolate mixture, then stir over a low heat for 2–3 minutes until the sauce thickens enough to coat the back of a spoon. It should feel heavy and look like thick pouring custard. Remove from the heat and stir in 1 teaspoon of vanilla extract. Set aside to cool for 10 minutes — it will continue to thicken as it sits.
-
Whip the cream: Pour the cold double cream into a chilled mixing bowl (a metal bowl straight from the fridge works brilliantly). Add the remaining 1 teaspoon of vanilla extract and the caster sugar. Whisk by hand or with an electric mixer until soft peaks form — when you lift the whisk, the cream should hold a gentle curl that flops over slightly. Be careful not to overwhip; if the cream turns grainy and looks like butter, you’ve gone too far. Stop at the soft peak stage for the lightest texture.
-
Layer the biscuits: Break the digestive biscuits into rough chunks — some should be the size of a 50p coin, others smaller crumbs. Spread a third of the broken biscuits across the bottom of a 9×13 inch baking dish or a large glass trifle bowl. The layer should be even but not tightly packed — you want gaps for the chocolate to seep through.
-
Add the chocolate layer: Pour half of the cooled chocolate sauce over the biscuit layer. Use a spatula to spread it gently, ensuring it drips down between the biscuit pieces. You’ll see the chocolate pooling in the gaps while the biscuits stay visible — this creates the lovely marbled effect later.
-
Add the cream layer: Spoon half of the whipped cream over the chocolate layer and spread it evenly with the back of the spoon. The cream should sit in a smooth, white blanket that contrasts with the dark chocolate beneath. Repeat the layering: remaining biscuits, remaining chocolate sauce, and finally the remaining whipped cream on top.
-
Finish and chill: Smooth the top layer of cream with a spatula until it’s even and slightly swirled. If using fresh berries, scatter them over the top now — they’ll sink slightly into the cream as it sets. Cover the dish tightly with aluminium foil and refrigerate for at least 1 hour, though 2–3 hours is better. The finished trifle should feel firm when you gently shake the dish, and the biscuits will have softened into a cake-like texture. Serve chilled.
Notes
And there you have it — a proper pudding that slides into a busy weeknight without fuss, mess, or oven time. I’d love to hear how yours turns out. Drop a comment below and let me know which layer your family fights over first.