Easy No Bake Oreo Dessert
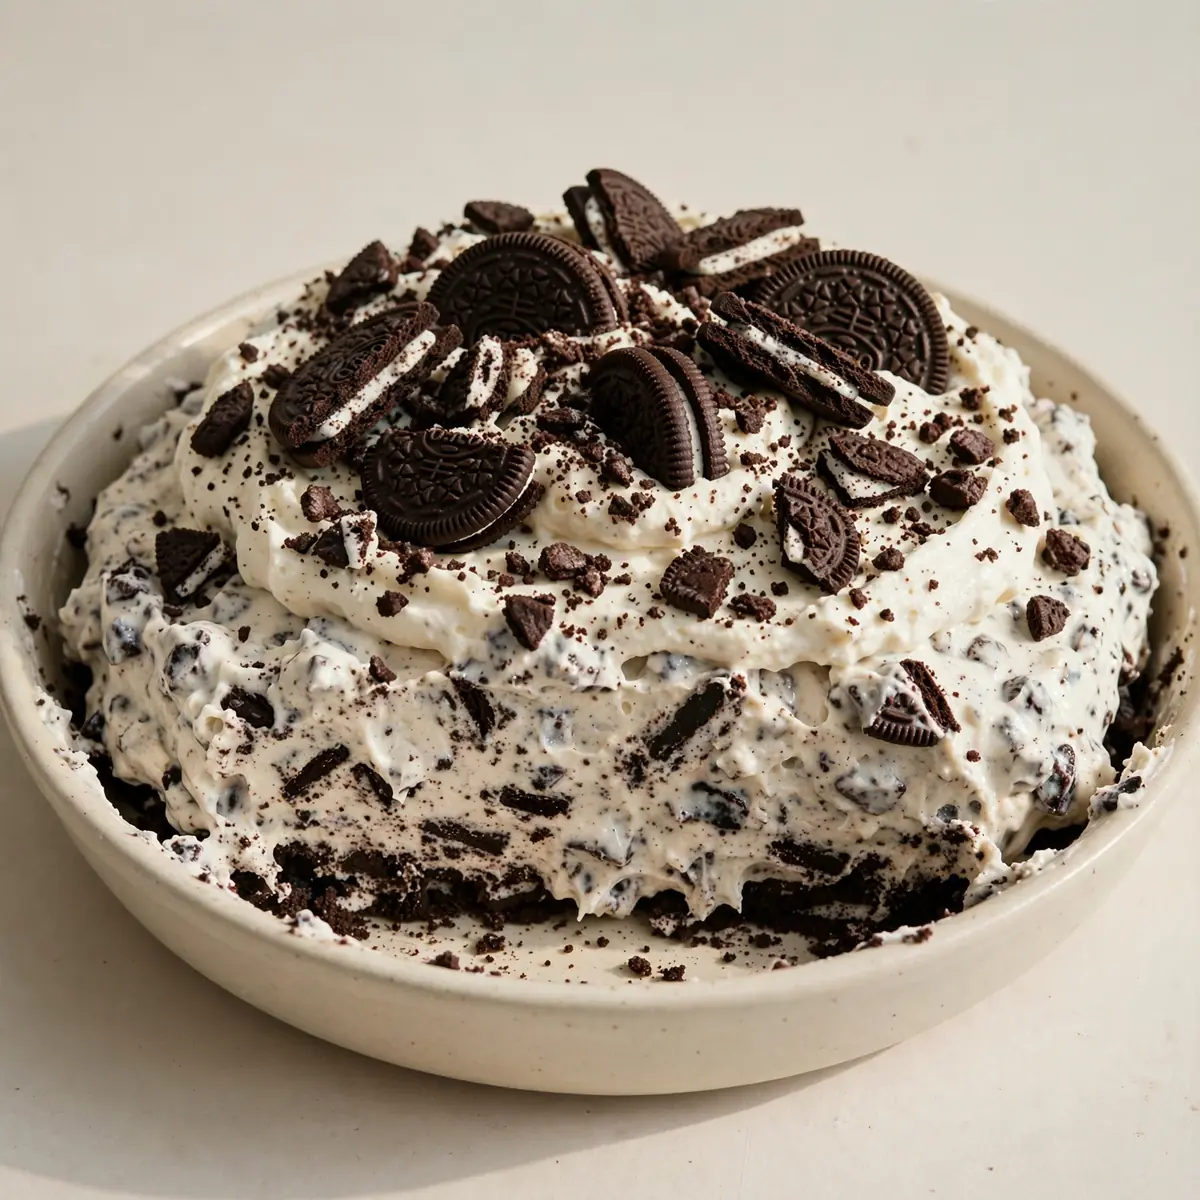
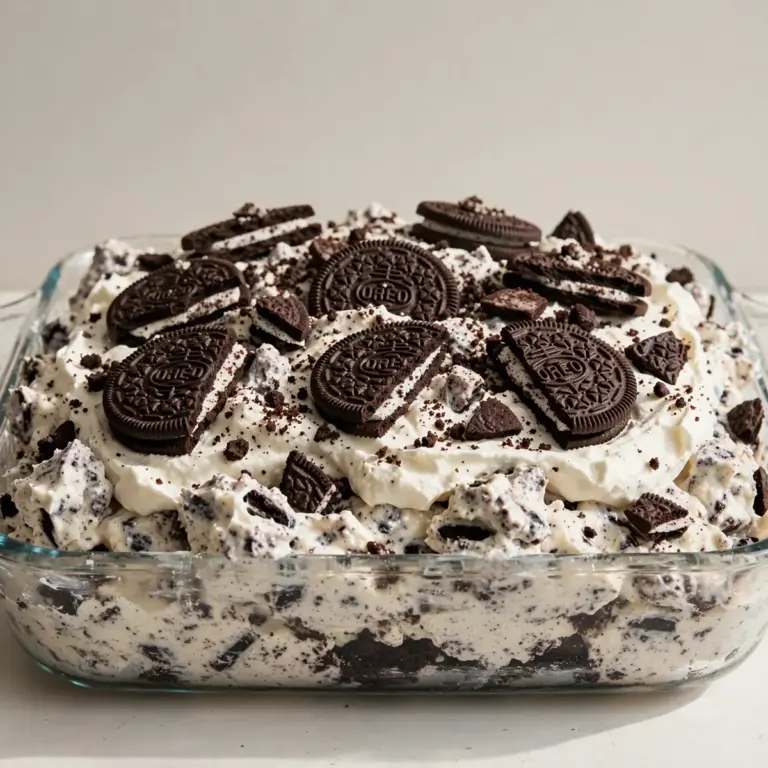
Some desserts feel like a cheat code, and this easy no bake oreo dessert is exactly that. It requires no oven time, uses simple ingredients you can find at any supermarket, and delivers a rich, creamy, layered treat that looks like you fussed for hours. After testing this recipe five times, I finally got it just right, and I’m thrilled to share the foolproof method with you.
Recipe Overview
- Prep time: 25 minutes
- Chill time: 4 hours (minimum) or overnight
- Total time: 4 hours 25 minutes
- Servings: 12 generous slices
- Difficulty: Easy
Why You’ll Love This Easy No Bake Oreo Dessert
- No oven required: Perfect for hot days when you don’t want to heat up the kitchen, or for anyone without an oven.
- Minimal ingredients: You only need a handful of items, most of which you might already have in your fridge and cupboard.
- Make-ahead friendly: This dessert actually tastes better after a full night in the fridge, making it ideal for parties and gatherings.
- Customisable layers: You can easily swap the pudding flavour or add extra toppings like chopped chocolate or nuts.
- Kid-friendly to assemble: Little ones can help crush the biscuits and layer the ingredients, making it a fun weekend activity.
Ingredients You’ll Need
- 400g Oreo biscuits (about 36 biscuits)
- 100g unsalted butter, melted
- 500ml full-fat milk
- 2 x 100g packets instant vanilla pudding mix
- 300ml double cream
- 50g icing sugar
- 1 tsp vanilla extract
- 250g full-fat cream cheese, softened
- 100g caster sugar
- Pinch of salt
Tip: Use full-fat cream cheese and double cream for the richest, creamiest texture. Low-fat versions will make the filling runny and less stable.
How to Make Easy No Bake Oreo Dessert
- Crush the Oreos: Place 300g of the Oreo biscuits (keeping the remaining 100g for the topping) in a large ziplock bag. Use a rolling pin to crush them until you have coarse crumbs with some small chunks remaining. You want a texture similar to wet sand with a few pea-sized bits for crunch. Set aside 100g of these crumbs for the topping later.
- Make the base: In a medium bowl, combine the remaining 200g of crushed Oreo crumbs with the 100g of melted butter. Stir with a fork until every crumb is coated and the mixture feels like damp, dark sand. Press this firmly into the bottom of a 9×13 inch baking dish using the back of a measuring cup or your fingers. The base should feel compact and solid, not loose. Place in the fridge to set while you prepare the filling.
- Prepare the pudding: In a large bowl, whisk together the 500ml milk and both packets of instant vanilla pudding mix. Whisk vigorously for 2 minutes until the mixture thickens and becomes glossy. You’ll notice it transform from a thin liquid to a thick, wobbly pudding that holds its shape when you lift the whisk. Set aside to firm up for 5 minutes.
- Whip the cream: In a separate large, chilled bowl, pour the 300ml double cream. Add the 50g icing sugar and 1 tsp vanilla extract. Using an electric hand mixer, beat on medium-high speed until soft peaks form. You’ll know it’s ready when the cream leaves soft, billowy trails on the surface and holds its shape when you lift the beaters, but is still silky and not stiff.
- Make the cream cheese layer: In another large bowl, beat the 250g softened cream cheese with the 100g caster sugar and a pinch of salt until smooth and completely lump-free. Scrape down the sides of the bowl with a spatula. The mixture should be pale, fluffy, and smell sweet and tangy. Fold in the prepared vanilla pudding until fully combined. The mixture will be thick and creamy, like a very rich custard.
- Fold in the whipped cream: Gently fold the whipped cream into the cream cheese and pudding mixture. Use a rubber spatula and a folding motion — cut down through the centre, scrape along the bottom, and bring up the side. Do this until no white streaks remain. The final mixture should be light, airy, and pale beige in colour, with a mousse-like texture.
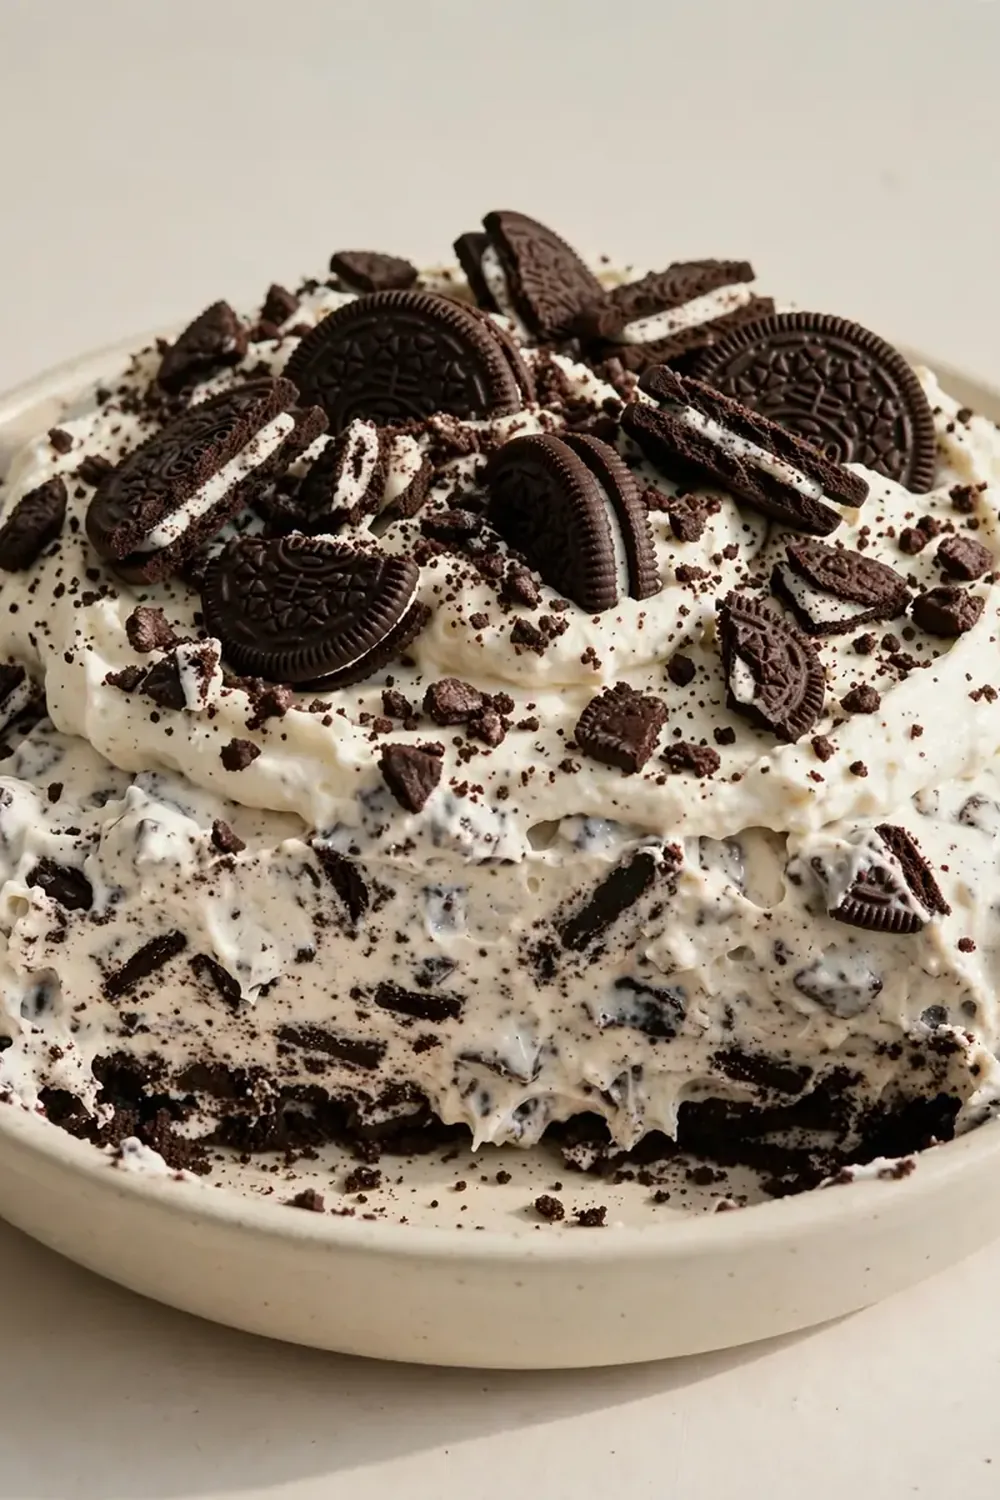
- Assemble the layers: Remove the baking dish from the fridge. Spread half of the creamy filling evenly over the Oreo base, smoothing the top with an offset spatula. It should look like a thick, even blanket. Scatter half of the reserved 100g crushed Oreo crumbs over the filling. Spread the remaining half of the creamy filling on top, again smoothing it out. Finally, sprinkle the remaining crushed Oreo crumbs and the 100g of whole Oreo biscuits you set aside over the top. Press them in very lightly so they stick.
- Chill and set: Cover the dish tightly with aluminium foil and place it in the fridge for at least 4 hours, but overnight is much better. The dessert needs this time to firm up so you can slice it cleanly. When ready, it should feel firm to the touch and hold its shape when you cut into it, with defined layers visible.
Tips From My Kitchen
- Chill your bowl and beaters for the cream: Double cream whips best when everything is cold. Pop your mixing bowl and beaters in the freezer for 10 minutes before you start. This prevents the cream from splitting or turning buttery, especially on a warm day, and gives you a much more stable, voluminous whip.
- Don’t over-crush the Oreos for the top: For the topping, you want a mix of fine crumbs and small, crunchy chunks. If you pulverise them into powder, you lose that lovely textural contrast against the smooth, creamy filling. The little bits of biscuit and cream centre provide a satisfying crunch.
- Press the base down very firmly: This is the most important step for a sliceable dessert. If the base is too loose, it will crumble when you try to serve it. Use the flat bottom of a glass or measuring cup to really compact the buttery crumbs. You should feel resistance as you press, and the surface should look solid and cohesive.
- Soften your cream cheese properly: Cold cream cheese will create lumps in your filling that no amount of mixing can fully remove. Take it out of the fridge 30-45 minutes before you start, or cut it into small cubes and leave it on the counter for 15 minutes. It should yield easily to a finger press without being greasy or runny.
- Use instant pudding, not cook-and-serve: Instant pudding is formulated to set without heat, which is essential for a no-bake dessert. Cook-and-serve pudding requires boiling on the stove and will not set properly in the fridge, leaving you with a soupy, unstable dessert that won’t hold its shape.
- Let it rest overnight for the best flavour: While 4 hours is the minimum, the flavours truly marry and deepen after 8-12 hours. The Oreo base softens slightly, becoming more like a cakey crust, and the filling firms up to a perfect, sliceable texture. I make this at least once a week – it’s become a family favourite, and it’s always better the next day.
Equipment You’ll Need
- 9×13 inch baking dish
- Aluminium foil
- Mixing bowls (at least 3 sizes: small, medium, large)
- Sharp knife
- Electric hand mixer or stand mixer
- Rubber spatula
- Offset spatula (optional, but helpful for smoothing)
- Rolling pin or a sturdy glass for crushing biscuits
- Large ziplock bag
- Measuring cups and spoons
Common Mistakes to Avoid
- Using cold cream cheese: Cold cream cheese won’t blend smoothly into the pudding mixture, leaving unpleasant white lumps throughout your filling. Always bring it to room temperature before you begin, and if you forget, microwave it in 10-second bursts until soft but not hot.
- Skipping the chill time: This dessert needs a minimum of 4 hours in the fridge to set properly. Cutting into it early will result in a sloppy, messy slice that collapses on the plate. The filling needs that time to firm up and hold its structure, so patience is absolutely key.
- Over-whipping the cream: Whipped cream can go from soft peaks to stiff, grainy butter in seconds. Stop beating as soon as the cream holds soft, droopy peaks. If you see it starting to look curdled or separated, you’ve gone too far and the cream will weep water into your dessert.
- Not pressing the base firmly enough: A loose, crumbly base will disintegrate when you try to lift a slice out of the dish. You need to apply serious, even pressure to compact the butter and crumbs into a solid, cohesive crust that can support the weight of the creamy layers above it.
- Using the wrong size dish: A dish that’s too small will cause the filling to overflow, while one that’s too large will give you thin, unsatisfying layers. Stick to a standard 9×13 inch dish for the perfect ratio of crust to filling to topping.
What to Serve With Easy No Bake Oreo Dessert
- A dollop of fresh whipped cream on each slice for extra indulgence.
- A drizzle of warm chocolate sauce or caramel sauce.
- A side of fresh berries, like raspberries or sliced strawberries, to cut through the richness with a little tartness.
- A strong cup of black coffee or an espresso to balance the sweetness.
- For a fun brunch twist, serve it alongside some Best Zucchini Bread Muffins for a sweet and savoury spread.
Still hungry for ideas? You might also love Mary Berry No Bake Lemon Tart, Easy No Bake Oreo Cheesecake Recipe from our sister kitchens.
Frequently Asked Questions
easy no bake oreo dessert
Ingredients
Method
-
Crush the Oreos: Place 300g of the Oreo biscuits (keeping the remaining 100g for the topping) in a large ziplock bag. Use a rolling pin to crush them until you have coarse crumbs with some small chunks remaining. You want a texture similar to wet sand with a few pea-sized bits for crunch. Set aside 100g of these crumbs for the topping later.
-
Make the base: In a medium bowl, combine the remaining 200g of crushed Oreo crumbs with the 100g of melted butter. Stir with a fork until every crumb is coated and the mixture feels like damp, dark sand. Press this firmly into the bottom of a 9×13 inch baking dish using the back of a measuring cup or your fingers. The base should feel compact and solid, not loose. Place in the fridge to set while you prepare the filling.
-
Prepare the pudding: In a large bowl, whisk together the 500ml milk and both packets of instant vanilla pudding mix. Whisk vigorously for 2 minutes until the mixture thickens and becomes glossy. You’ll notice it transform from a thin liquid to a thick, wobbly pudding that holds its shape when you lift the whisk. Set aside to firm up for 5 minutes.
-
Whip the cream: In a separate large, chilled bowl, pour the 300ml double cream. Add the 50g icing sugar and 1 tsp vanilla extract. Using an electric hand mixer, beat on medium-high speed until soft peaks form. You’ll know it’s ready when the cream leaves soft, billowy trails on the surface and holds its shape when you lift the beaters, but is still silky and not stiff.
-
Make the cream cheese layer: In another large bowl, beat the 250g softened cream cheese with the 100g caster sugar and a pinch of salt until smooth and completely lump-free. Scrape down the sides of the bowl with a spatula. The mixture should be pale, fluffy, and smell sweet and tangy. Fold in the prepared vanilla pudding until fully combined. The mixture will be thick and creamy, like a very rich custard.
-
Fold in the whipped cream: Gently fold the whipped cream into the cream cheese and pudding mixture. Use a rubber spatula and a folding motion — cut down through the centre, scrape along the bottom, and bring up the side. Do this until no white streaks remain. The final mixture should be light, airy, and pale beige in colour, with a mousse-like texture.
-
Assemble the layers: Remove the baking dish from the fridge. Spread half of the creamy filling evenly over the Oreo base, smoothing the top with an offset spatula. It should look like a thick, even blanket. Scatter half of the reserved 100g crushed Oreo crumbs over the filling. Spread the remaining half of the creamy filling on top, again smoothing it out. Finally, sprinkle the remaining crushed Oreo crumbs and the 100g of whole Oreo biscuits you set aside over the top. Press them in very lightly so they stick.
-
Chill and set: Cover the dish tightly with aluminium foil and place it in the fridge for at least 4 hours, but overnight is much better. The dessert needs this time to firm up so you can slice it cleanly. When ready, it should feel firm to the touch and hold its shape when you cut into it, with defined layers visible.
Notes
I’d love to hear how this easy no bake Oreo dessert turns out in your kitchen. Drop a comment below and let me know if you added any twists, or if you served it at a party — I always enjoy reading about your baking adventures. For another no-fuss, creamy dessert, you might also enjoy our No Bake Strawberry Cheesecake Pots or a batch of Healthy No Bake Protein Balls for a lighter bite.