No-Bake Peanut Butter Chocolate Fudge
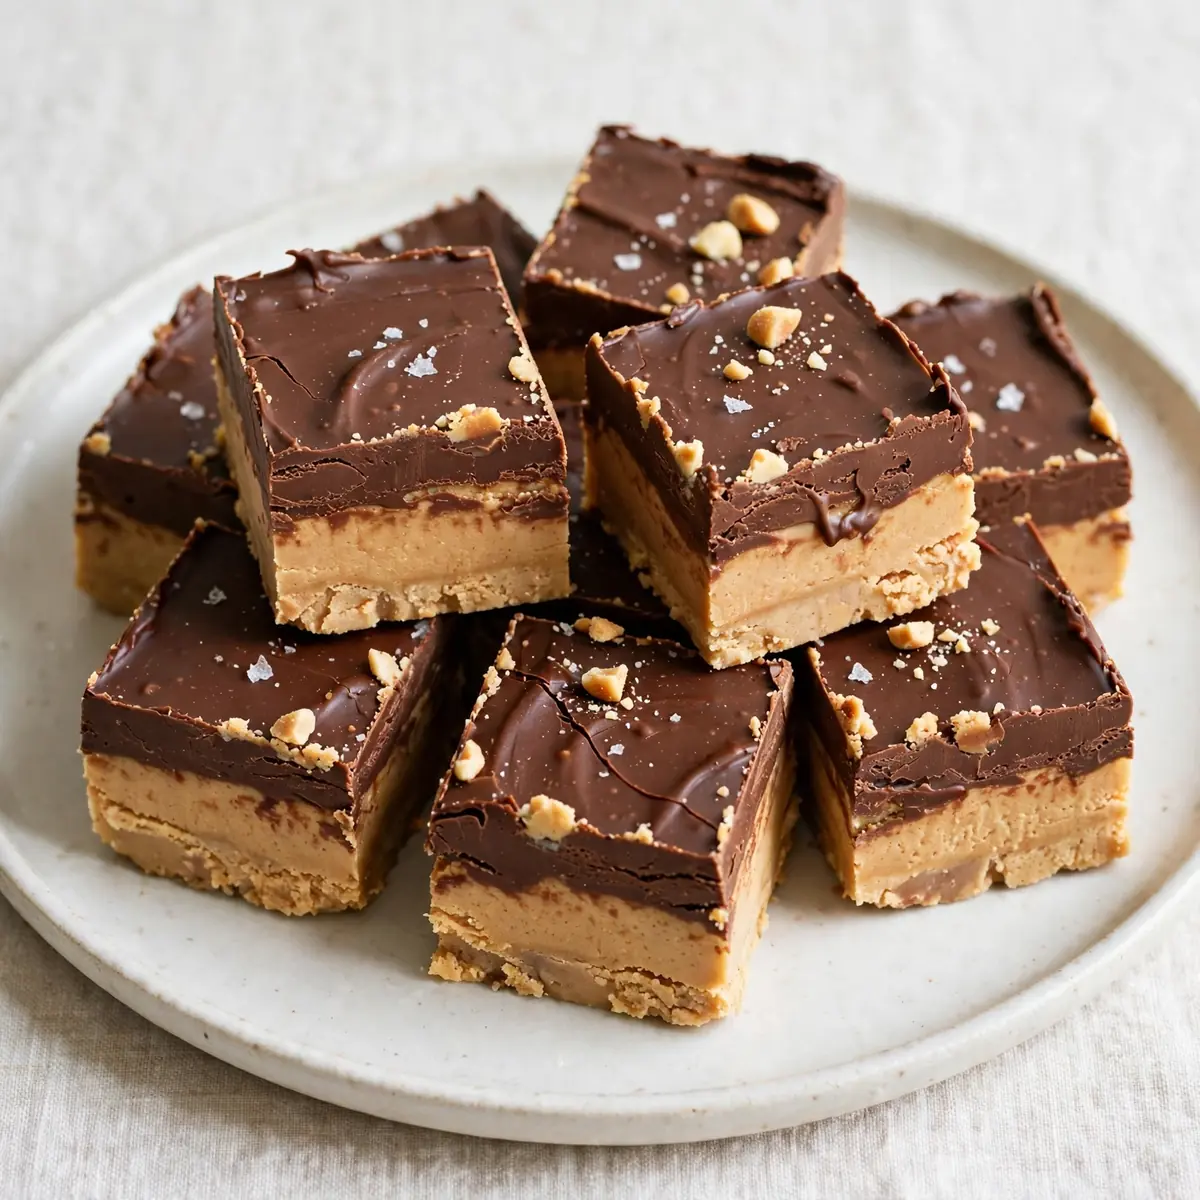
When the school run, after-school clubs, and a mountain of laundry collide, I need a dessert that practically makes itself while I tackle the evening chaos. This No-Bake Peanut Butter Chocolate Fudge is my secret weapon: it comes together in less time than it takes to order a takeaway, uses one pan for melting, and sits quietly in the fridge until we’re ready for a square of something sweet.
Recipe Overview
- Prep Time: 10 minutes
- Cook Time: 5 minutes (melting)
- Total Time: 15 minutes active, plus 2 hours chilling
- Servings: 24 generous squares
- Difficulty: Beginner-friendly
Why You’ll Love This No-Bake Peanut Butter Chocolate Fudge
- Ready in under 15 minutes of active work. While the kids do homework or bath time, you can have the fudge mixture pressed into the dish and sliding into the fridge. No oven preheating, no waiting for butter to soften.
- Only one pan to wash. I melt everything in a single saucepan, then press it into the lined dish. By the time the fudge is set, the pan has already soaked clean. Less washing up means more time for a cuppa.
- Make-ahead perfection. This fudge keeps beautifully in the fridge for up to two weeks. I often double the batch on a Sunday evening, and we have treats ready for lunchboxes, after-school snacks, and even last-minute visitors all week.
- No special equipment required. You don’t need a stand mixer, food processor, or candy thermometer. Just a saucepan, a spoon, and a baking dish. This is what I call a ‘real life’ recipe.
- Naturally crowd-friendly. Because it contains no eggs, no alcohol, and no gelatine, it suits a wide range of dietary needs. I’ve brought this to school bake sales and playdates, and it’s always the first tray to empty.
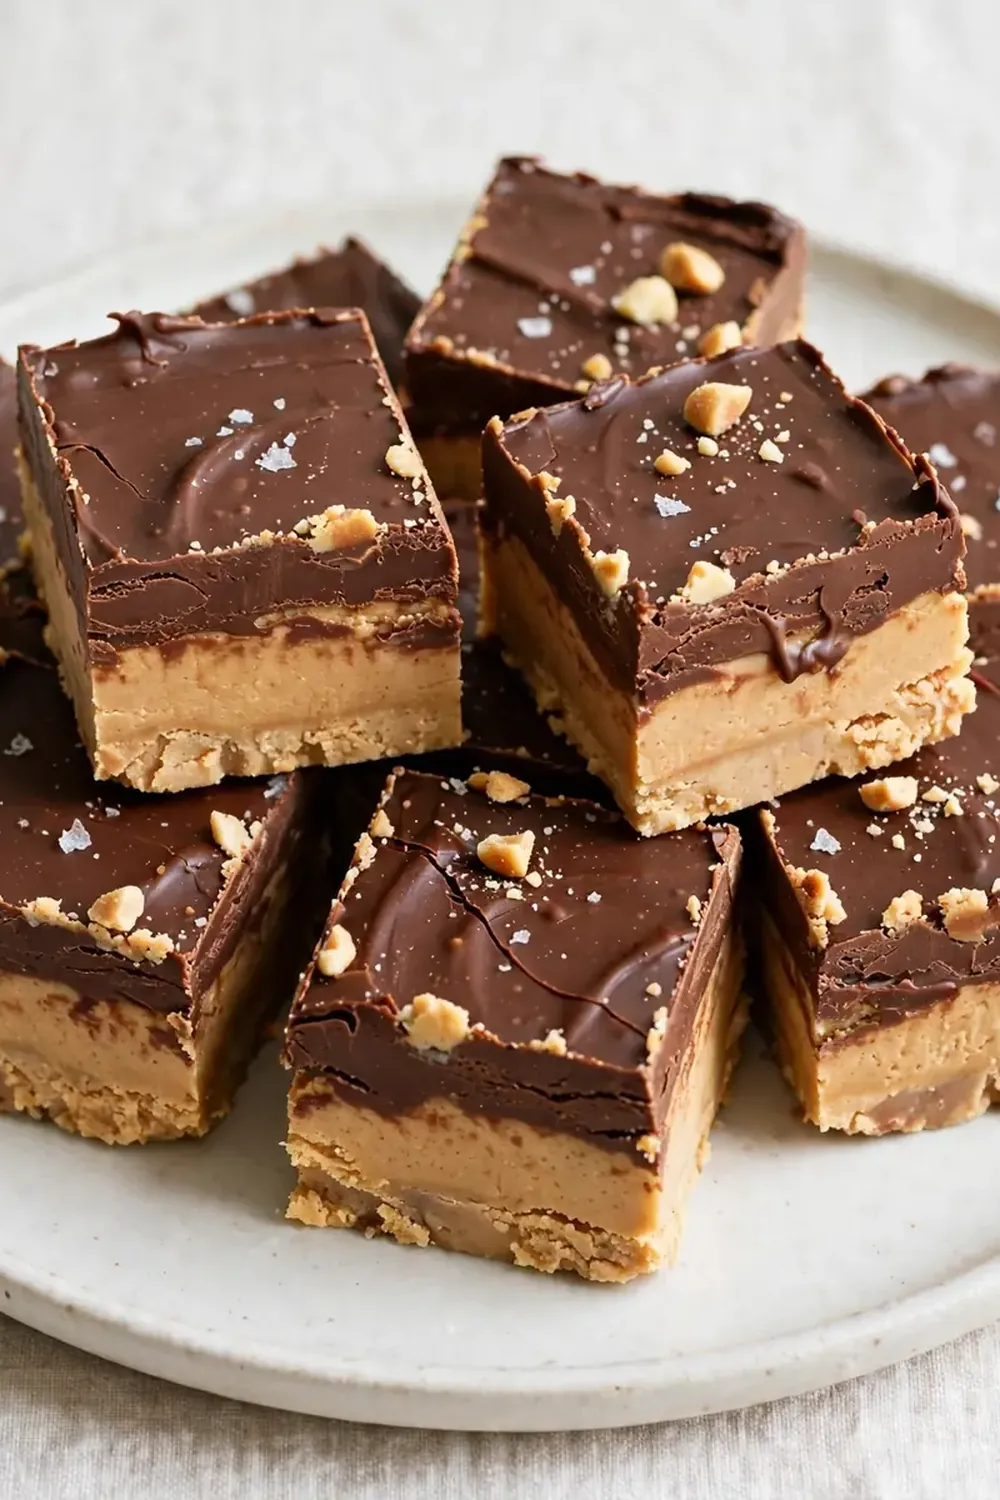
Ingredients You’ll Need
- 400g (14 oz) good-quality dark chocolate (70% cocoa), roughly chopped
- 395g (14 oz) can sweetened condensed milk
- 200g (7 oz) smooth peanut butter (no added sugar or salt preferred)
- 60g (¼ cup) unsalted butter, cubed
- 1 teaspoon vanilla extract
- ¼ teaspoon fine sea salt (plus extra flakes for topping)
- 100g (3½ oz) roasted, unsalted peanuts, roughly chopped
- 100g (3½ oz) milk chocolate chips (optional, for extra sweetness)
Tip: For the best texture, use a block of dark chocolate rather than pre-chopped chips; block chocolate melts more evenly and gives a smoother finish. If your peanut butter is the kind that separates, give it a thorough stir before measuring.
How to Make No-Bake Peanut Butter Chocolate Fudge
- Line your baking dish. Take a 9×13 inch baking dish and line it completely with a large sheet of aluminium foil, leaving an overhang on two opposite sides. Press the foil into the corners so there are no wrinkles. This foil sling will let you lift the entire block of fudge out later without any struggle.
- Melt the base. Place a medium saucepan over low heat. Add the chopped dark chocolate, sweetened condensed milk, peanut butter, and cubed butter. Stir constantly with a silicone spatula or wooden spoon. You’ll see the butter and chocolate begin to soften and streak together – keep stirring. After about 4 minutes, the mixture will turn glossy and completely uniform, with no visible streaks of butter or chocolate. It should smell deeply of roasted peanuts and cocoa. Remove from heat immediately.
- Add the flavourings. Stir in the vanilla extract and the fine sea salt. The mixture will become slightly more fluid and aromatic. You’ll notice the vanilla scent blooming as it hits the warm fudge. Fold in the chopped peanuts and milk chocolate chips if using, distributing them evenly. The fudge will feel thick and heavy on the spoon, like a dense ganache.
- Press into the dish. Scrape every last bit of the fudge mixture into the prepared baking dish. Use a silicone spatula or the back of a spoon to spread it evenly into all four corners. The surface should be relatively level – don’t worry about perfection, as the fudge will be cut into squares. Sprinkle the top with a pinch of flaky sea salt for that salty-sweet contrast.
- Chill until firm. Place the dish in the refrigerator, uncovered, for at least 2 hours. The fudge needs this time to set completely. You’ll know it’s ready when the surface feels firm to the touch and the foil peels away cleanly from the edges. If you’re in a hurry, you can pop it in the freezer for 45 minutes, but fridge setting gives a creamier texture.
- Cut and serve. Once fully set, use the foil overhang to lift the entire block out of the dish. Place it on a cutting board. Use a sharp knife to cut into 24 even squares – I find a warm knife (run under hot water and dried) gives the cleanest cuts. The fudge should slice with a clean break, revealing a dense, fudgy interior studded with peanut pieces.
Equipment You’ll Need
- 9×13 inch baking dish
- Aluminium foil
- Medium saucepan
- Silicone spatula or wooden spoon
- Sharp knife
- Cutting board
- Measuring spoons and cups
Tips From My Kitchen
- Use low heat for melting. Chocolate and condensed milk are both sensitive to high heat. If the heat is too high, the chocolate can seize and turn grainy, or the condensed milk can scorch. Keep the burner on low and stir constantly – the mixture will come together beautifully without any drama.
- Don’t skip the salt. The flaky sea salt on top is not just for decoration. It balances the sweetness of the condensed milk and the richness of the chocolate, making each bite more complex. I’ve forgotten it before, and the fudge tasted flat.
- Line your dish generously. Make sure your foil overhang is at least 5cm (2 inches) on each side. This gives you a sturdy handle to lift the fudge out. If the foil is too short, you’ll end up digging it out with a spatula, which makes for messy squares.
- Chill thoroughly before cutting. Patience is the hardest part. If you try to cut the fudge when it’s still slightly soft, the knife will drag and the squares will look ragged. After 2 hours in the fridge, the fudge should be firm but not rock-hard – it should yield cleanly to a sharp knife.
- Store in the fridge, not the counter. Because this fudge contains condensed milk and butter, it will soften and become sticky at room temperature. Keep it in an airtight container in the fridge for up to two weeks. I stack the squares with small pieces of baking paper between layers to prevent them from sticking together.
- Double the batch for busy weeks. This is my go-to recipe when I need something quick but impressive. I make this at least once a week – it’s become a family favourite. The recipe doubles perfectly; just use a larger dish or two separate dishes, and increase the chilling time by about 30 minutes.
Delicious Variations to Try
- Spicy Version: Add ½ teaspoon of cayenne pepper and ½ teaspoon of smoked paprika to the melted mixture along with the vanilla. The heat builds gently at the back of the throat and pairs wonderfully with the dark chocolate. A pinch of cinnamon also works well here.
- Vegan Option: Use a high-quality vegan dark chocolate (check it’s dairy-free), swap the butter for a plant-based block butter, and use a vegan condensed milk (coconut-based versions work beautifully). The texture will be slightly softer but just as delicious.
- Different Nut Butter: Replace the peanut butter with almond butter, cashew butter, or tahini for a different flavour profile. If using tahini, reduce the quantity to 150g as it’s more liquid. The fudge will take on the character of the nut or seed butter you choose.
What to Serve With No-Bake Peanut Butter Chocolate Fudge
- A cold glass of oat milk or regular milk – the classic pairing for dipping each square.
- Fresh berries, particularly raspberries or strawberries, which cut through the richness with their sharp acidity.
- A scoop of vanilla ice cream for an impromptu sundae – crumble the fudge over the top.
- A strong cup of black coffee or espresso to contrast the sweetness.
- For a dessert platter, serve alongside No Bake Coconut Macaroons for a textural contrast.
Still hungry for ideas? You might also love No Bake Chocolate Peanut Butter Balls, Hot Chocolate Peppermint Fudge No Bake from our sister kitchens.
Frequently Asked Questions
No-Bake Peanut Butter Chocolate Fudge
Ingredients
Method
- Line your baking dish. Take a 9x13 inch baking dish and line it completely with a large sheet of aluminium foil, leaving an overhang on two opposite sides. Press the foil into the corners so there are no wrinkles. This foil sling will let you lift the entire block of fudge out later without any struggle.
- Melt the base. Place a medium saucepan over low heat. Add the chopped dark chocolate, sweetened condensed milk, peanut butter, and cubed butter. Stir constantly with a silicone spatula or wooden spoon. You'll see the butter and chocolate begin to soften and streak together – keep stirring. After about 4 minutes, the mixture will turn glossy and completely uniform, with no visible streaks of butter or chocolate. It should smell deeply of roasted peanuts and cocoa. Remove from heat immediately.
- Add the flavourings. Stir in the vanilla extract and the fine sea salt. The mixture will become slightly more fluid and aromatic. You'll notice the vanilla scent blooming as it hits the warm fudge. Fold in the chopped peanuts and milk chocolate chips if using, distributing them evenly. The fudge will feel thick and heavy on the spoon, like a dense ganache.
- Press into the dish. Scrape every last bit of the fudge mixture into the prepared baking dish. Use a silicone spatula or the back of a spoon to spread it evenly into all four corners. The surface should be relatively level – don't worry about perfection, as the fudge will be cut into squares. Sprinkle the top with a pinch of flaky sea salt for that salty-sweet contrast.
- Chill until firm. Place the dish in the refrigerator, uncovered, for at least 2 hours. The fudge needs this time to set completely. You'll know it's ready when the surface feels firm to the touch and the foil peels away cleanly from the edges. If you're in a hurry, you can pop it in the freezer for 45 minutes, but fridge setting gives a creamier texture.
- Cut and serve. Once fully set, use the foil overhang to lift the entire block out of the dish. Place it on a cutting board. Use a sharp knife to cut into 24 even squares – I find a warm knife (run under hot water and dried) gives the cleanest cuts. The fudge should slice with a clean break, revealing a dense, fudgy interior studded with peanut pieces.
Notes
This fudge has saved my sanity on more Tuesday nights than I can count – it’s the dessert that waits patiently while life happens around it. I hope you give it a try and make it your own. Drop a comment below and let me know how it turned out, or if you came up with a variation that your family loved. Happy cooking, and enjoy every sticky, chocolatey square.