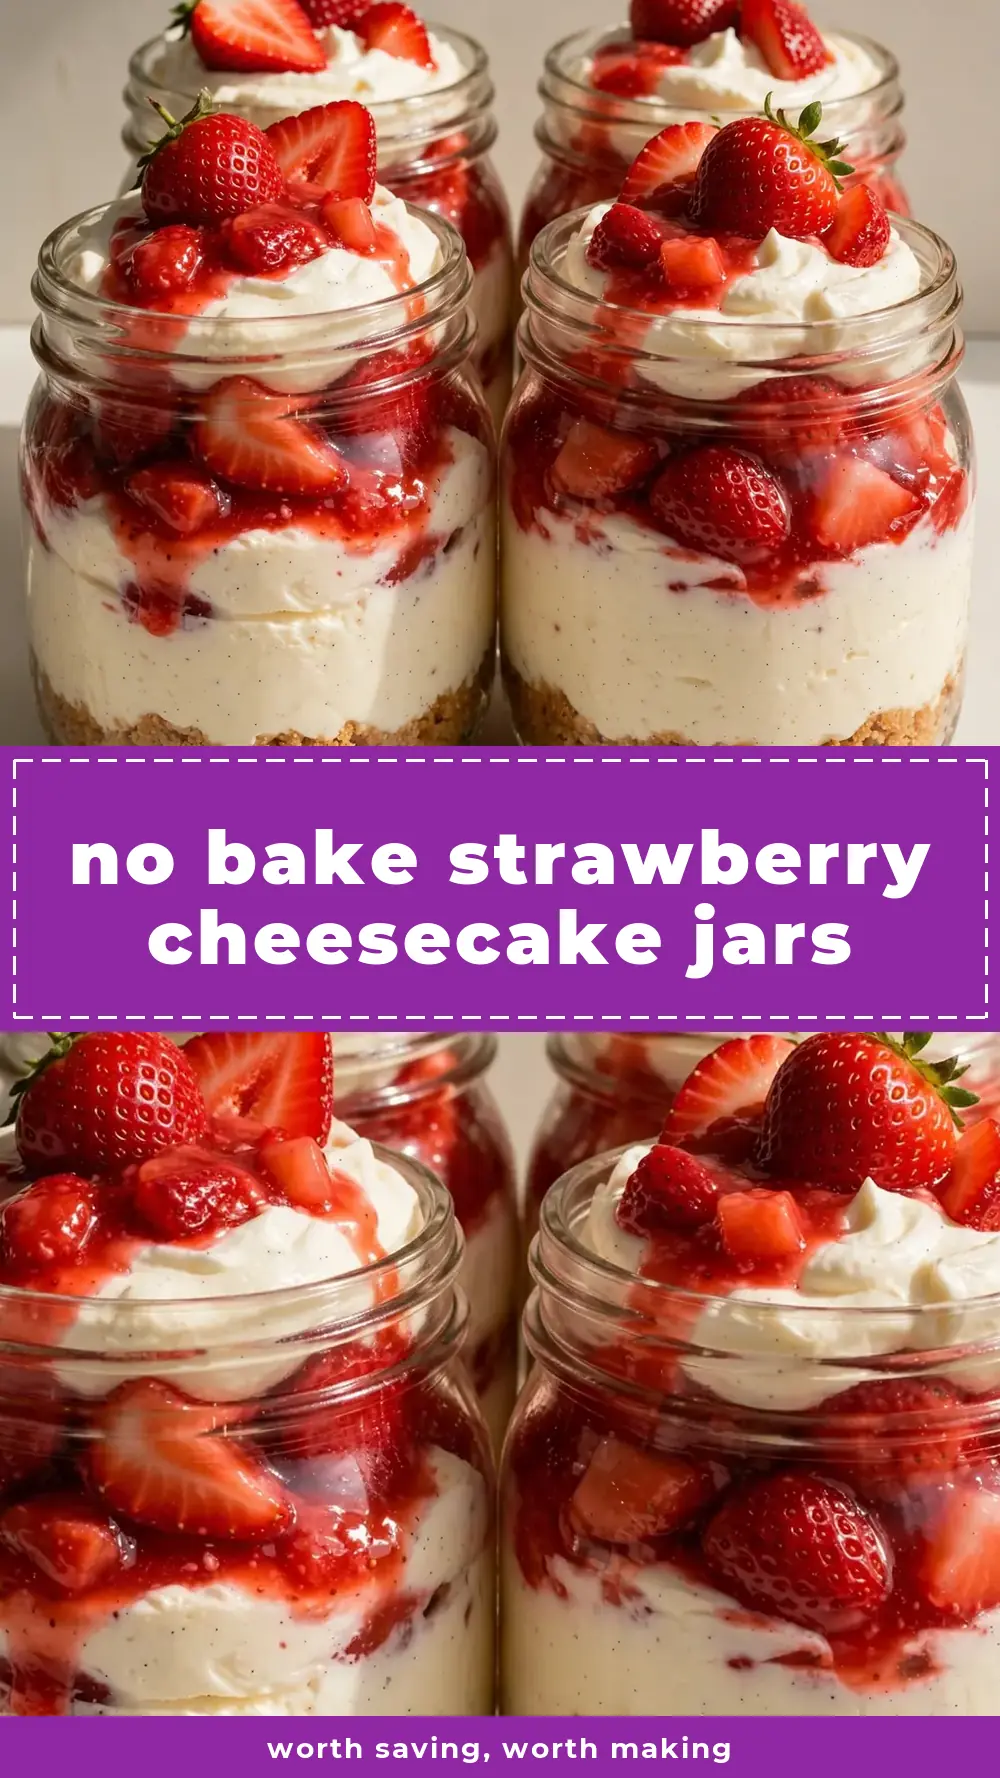
No Bake Strawberry Cheesecake Jars
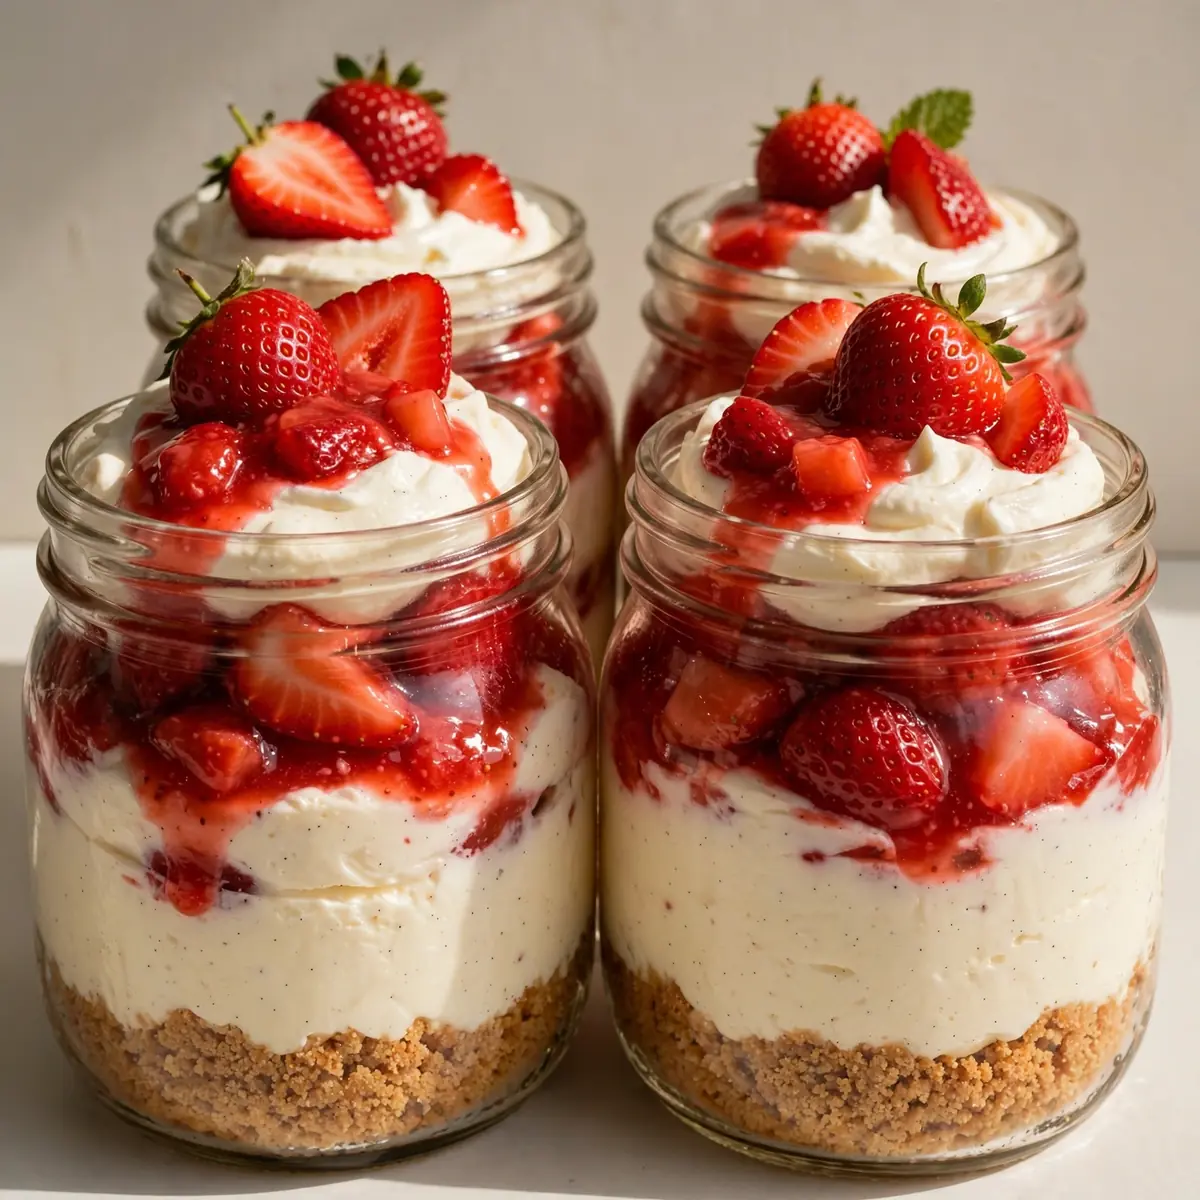
If you’re after a dessert that looks like a showstopper but requires zero oven time, these no bake strawberry cheesecake jars are exactly what you need. After testing this recipe five times, I finally got it just right, and I’m thrilled to share the final version with you today.
Recipe Overview
- Prep time: 25 minutes
- Chill time: 4 hours (minimum)
- Total time: 4 hours 25 minutes
- Servings: 4 jars (250ml each)
- Difficulty: Easy
Why You’ll Love This No Bake Strawberry Cheesecake Jars
- No oven required: Perfect for warm days when you don’t want to heat up the kitchen, or for anyone without access to an oven.
- Individual portions: Each jar is self-contained, making serving a breeze and portion control effortless.
- Make-ahead friendly: These jars actually improve after a few hours in the fridge, so you can prepare them the day before your gathering.
- Customisable toppings: Swap the strawberry topping for raspberry, blueberry, or even a drizzle of caramel sauce.
- Buttery biscuit base: That classic crunch against the silky cream cheese filling is pure bliss, and it holds up beautifully in the jar.
Ingredients You’ll Need
- 150g digestive biscuits
- 60g unsalted butter, melted
- 250g full-fat cream cheese, at room temperature
- 100g caster sugar
- 1 teaspoon vanilla extract
- 200ml double cream
- 250g fresh strawberries, hulled
- 2 tablespoons icing sugar
- 1 tablespoon lemon juice
- 1 teaspoon cornflour mixed with 1 tablespoon cold water (optional, for thickening)
Tip: Make sure your cream cheese is truly at room temperature — if it’s too cold, your filling will end up lumpy rather than luxuriously smooth.
How to Make No Bake Strawberry Cheesecake Jars
- Make the biscuit base: Place the digestive biscuits in a sealed plastic bag and crush them with a rolling pin until you have fine crumbs with a few slightly larger pieces for texture. Alternatively, pulse them in a food processor. The crumbs should feel sandy when you rub them between your fingers. Pour the melted butter over the crumbs and stir until every particle is coated and the mixture smells richly buttery.
- Press into jars: Divide the buttery crumb mixture evenly among four 250ml jars. Use the back of a teaspoon to press the crumbs down firmly and evenly — you want a compact, solid layer about 1.5cm thick. Place the jars in the fridge to set while you prepare the filling.
- Beat the cream cheese: In a large mixing bowl, beat the softened cream cheese with an electric hand mixer until it’s completely smooth and there are no lumps whatsoever — this should take about 2 minutes. The texture will look glossy and feel silky on the spoon.
- Add sugar and vanilla: Add the caster sugar and vanilla extract, then beat for another minute until the mixture is light, fluffy, and pale in colour. You’ll notice it becoming airy and slightly thicker.
- Whip the double cream: In a separate bowl, whip the double cream until soft peaks form — when you lift the beaters, the cream should hold its shape but still be soft and billowy, not stiff. Be careful not to overwhip, or the cream will turn grainy and eventually become butter.
- Fold everything together: Gently fold the whipped cream into the cream cheese mixture using a spatula. Use a cutting motion through the centre, then fold the mixture over itself. Stop as soon as no white streaks remain — the final texture should be thick, mousse-like, and a uniform pale ivory colour.
- Prepare the strawberry topping: Chop half the strawberries into small pieces and slice the remaining half. Place the chopped strawberries in a small saucepan with the icing sugar and lemon juice. Cook over medium heat for 5-7 minutes, stirring occasionally, until the strawberries break down and the mixture becomes thick and jammy — it should look deep red and syrupy. If it’s too runny, stir in the cornflour slurry and cook for another minute until thickened.
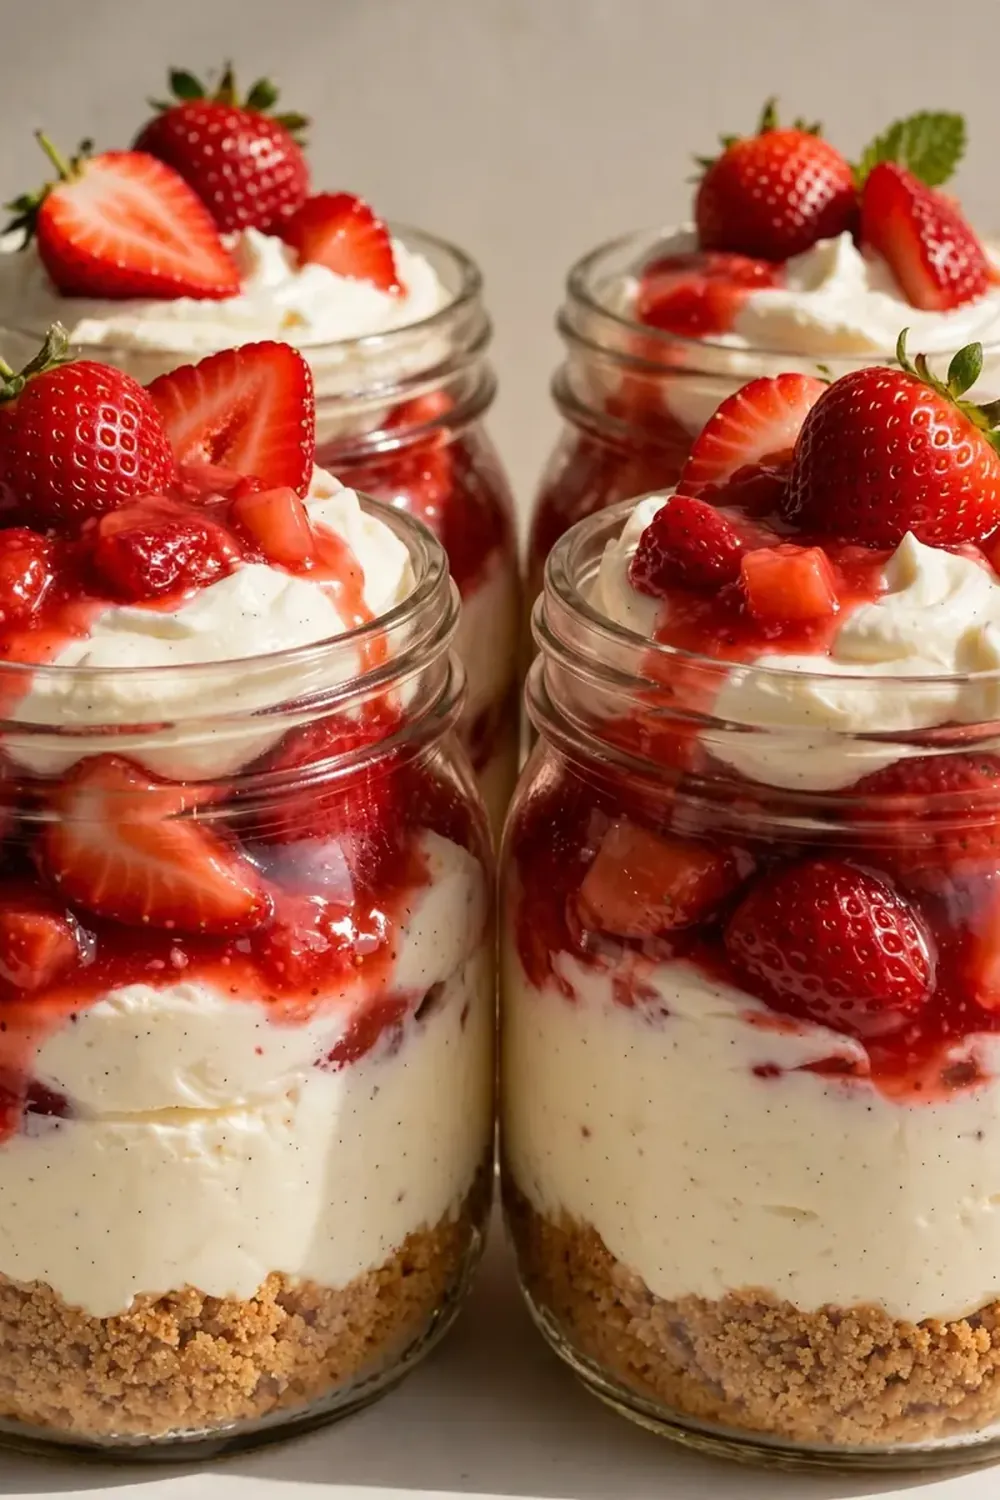
- Assemble the jars: Spoon the cheesecake filling over the set biscuit bases, dividing it evenly. Smooth the tops with the back of a spoon. Spoon the strawberry topping over the filling, then arrange the sliced strawberries on top for a beautiful finish.
- Chill thoroughly: Place the jars in the fridge for at least 4 hours, but overnight is even better. The filling will firm up to a sliceable, creamy consistency, and the flavours will meld beautifully.
Tips From My Kitchen
- Use full-fat cream cheese for the best texture: Low-fat versions contain more water and less fat, which means they set softer and can make your filling runny. Full-fat cream cheese gives that luxurious, thick, silky texture that makes these jars so satisfying.
- Chill your bowl and beaters for the cream: If you pop the mixing bowl and beaters in the fridge for 15 minutes before whipping the double cream, it will whip up faster and hold its shape much better. This is especially helpful on a warm day.
- Don’t skip the lemon juice in the strawberry topping: The acidity brightens the flavour of the strawberries and balances the sweetness of the cheesecake filling. It also helps the fruit retain its vibrant red colour rather than turning dull brown.
- Press the biscuit base firmly: A loose base will crumble when you dig into the jar. Use the flat bottom of a shot glass or a small measuring cup to press the crumbs down with real authority — you want them compacted enough to hold together when spooned.
- Let the jars rest overnight if possible: The filling needs time to set properly. After 4 hours it will be firm enough to eat, but after 8-12 hours the texture becomes velvety and the biscuit base softens just slightly, creating the perfect bite every time.
Equipment You’ll Need
- Electric hand mixer or stand mixer
- 4 x 250ml glass jars with lids
- Mixing bowls (large and medium)
- Spatula for folding
- Small saucepan
- Rolling pin or food processor for crushing biscuits
- Measuring spoons and kitchen scales
Common Mistakes to Avoid
- Using cold cream cheese: Cold cream cheese won’t blend smoothly and will leave you with lumpy, unappealing patches in your filling. Always let it sit at room temperature for at least 30 minutes before you start. It should feel soft and give slightly when pressed with a finger.
- Overwhipping the double cream: Cream can go from perfect peaks to grainy, separated butter in seconds. Stop as soon as the cream holds its shape when you lift the beaters — the surface should look smooth and glossy, not textured or curdled.
- Skipping the chill time: I know it’s tempting to dig in straight away, but the filling needs those hours in the fridge to set properly. If you skip this step, you’ll end up with a soupy mess rather than a neat, spoonable cheesecake.
Delicious Variations to Try
- Chocolate Strawberry Version: Add 2 tablespoons of cocoa powder to the biscuit crumbs before adding the butter, and drizzle melted dark chocolate over the top of each jar before serving. The bitter chocolate pairs beautifully with the sweet strawberries.
- Vegan Option: Use a plant-based cream cheese (the block style works best), coconut cream that has been chilled overnight instead of double cream, and a vegan butter alternative. Digestive biscuits are often accidentally vegan, but always check the label. The texture will be slightly different but still deliciously creamy.
- Mixed Berry Version: Replace half the strawberries with raspberries and blueberries in the topping. Cook them together with the sugar and lemon juice for a beautiful deep purple-red sauce that tastes just like summer.
What to Serve With No Bake Strawberry Cheesecake Jars
- A dollop of extra whipped cream on top for added indulgence
- Fresh mint leaves for a pop of colour and freshness
- A handful of crushed pistachios or flaked almonds for crunch
- For a full dessert spread, these pair beautifully with our Refreshing Peach Sorbet Dessert Recipes for a fruity contrast
- Or try alongside a slice of Moist Zucchini Chocolate Chip Cake for those who want a baked option too
Still hungry for ideas? You might also love Strawberry Crunch Cheesecake Cones Recipe, Strawberry Crunch Cheesecake Tacos from our sister kitchens.
Frequently Asked Questions
no bake strawberry cheesecake jars
Ingredients
Method
-
Make the biscuit base: Place the digestive biscuits in a sealed plastic bag and crush them with a rolling pin until you have fine crumbs with a few slightly larger pieces for texture. Alternatively, pulse them in a food processor. The crumbs should feel sandy when you rub them between your fingers. Pour the melted butter over the crumbs and stir until every particle is coated and the mixture smells richly buttery.
-
Press into jars: Divide the buttery crumb mixture evenly among four 250ml jars. Use the back of a teaspoon to press the crumbs down firmly and evenly — you want a compact, solid layer about 1.5cm thick. Place the jars in the fridge to set while you prepare the filling.
-
Beat the cream cheese: In a large mixing bowl, beat the softened cream cheese with an electric hand mixer until it’s completely smooth and there are no lumps whatsoever — this should take about 2 minutes. The texture will look glossy and feel silky on the spoon.
-
Add sugar and vanilla: Add the caster sugar and vanilla extract, then beat for another minute until the mixture is light, fluffy, and pale in colour. You’ll notice it becoming airy and slightly thicker.
-
Whip the double cream: In a separate bowl, whip the double cream until soft peaks form — when you lift the beaters, the cream should hold its shape but still be soft and billowy, not stiff. Be careful not to overwhip, or the cream will turn grainy and eventually become butter.
-
Fold everything together: Gently fold the whipped cream into the cream cheese mixture using a spatula. Use a cutting motion through the centre, then fold the mixture over itself. Stop as soon as no white streaks remain — the final texture should be thick, mousse-like, and a uniform pale ivory colour.
-
Prepare the strawberry topping: Chop half the strawberries into small pieces and slice the remaining half. Place the chopped strawberries in a small saucepan with the icing sugar and lemon juice. Cook over medium heat for 5-7 minutes, stirring occasionally, until the strawberries break down and the mixture becomes thick and jammy — it should look deep red and syrupy. If it’s too runny, stir in the cornflour slurry and cook for another minute until thickened.
-
Assemble the jars: Spoon the cheesecake filling over the set biscuit bases, dividing it evenly. Smooth the tops with the back of a spoon. Spoon the strawberry topping over the filling, then arrange the sliced strawberries on top for a beautiful finish.
-
Chill thoroughly: Place the jars in the fridge for at least 4 hours, but overnight is even better. The filling will firm up to a sliceable, creamy consistency, and the flavours will meld beautifully.
Notes
I’d love to hear how your no bake strawberry cheesecake jars turn out! Drop a comment below with any questions or your own twists on the recipe — I read every single one and I’m always here to help.