Ingredients
Method
- Prepare the base: Preheat your oven to 160°C (140°C fan). Crush the digestive biscuits into fine crumbs — I put them in a sealed freezer bag and bash them with a rolling pin until they feel like damp sand. Mix the crumbs with the melted butter until every grain is coated and the mixture holds together when squeezed in your fist. Press this firmly into the bottom of a 20cm springform tin lined with parchment paper. The base should feel compact and even when you run your fingers across it. Bake for 10 minutes, then set aside to cool while you make the filling.
- Make the cheesecake filling: In a large mixing bowl, beat the cream cheese with an electric mixer until it looks pale, fluffy, and feels light as air — about 3 minutes. Add the caster sugar and beat for another 2 minutes until the mixture feels silky smooth with no graininess between your fingers if you rub a tiny bit. Add the eggs one at a time, beating on low speed after each addition until just combined. The mixture should look glossy and smell rich and creamy. Stir in the double cream and vanilla extract until the batter is completely uniform and has a thick, velvety texture.
- Prepare the red velvet layer: In a separate bowl, sift together the flour, cocoa powder, baking powder, bicarbonate of soda, and salt. The cocoa should smell deep and dark, not stale. In a small jug, whisk together the buttermilk, red gel colouring, and white vinegar — the mixture will look almost magenta and smell slightly tangy. Gradually add the dry ingredients to the buttermilk mixture, stirring gently until just combined. The batter should be thick, smooth, and a vibrant red colour with no streaks of white flour. Be careful not to overmix, or the cake layer will become tough.
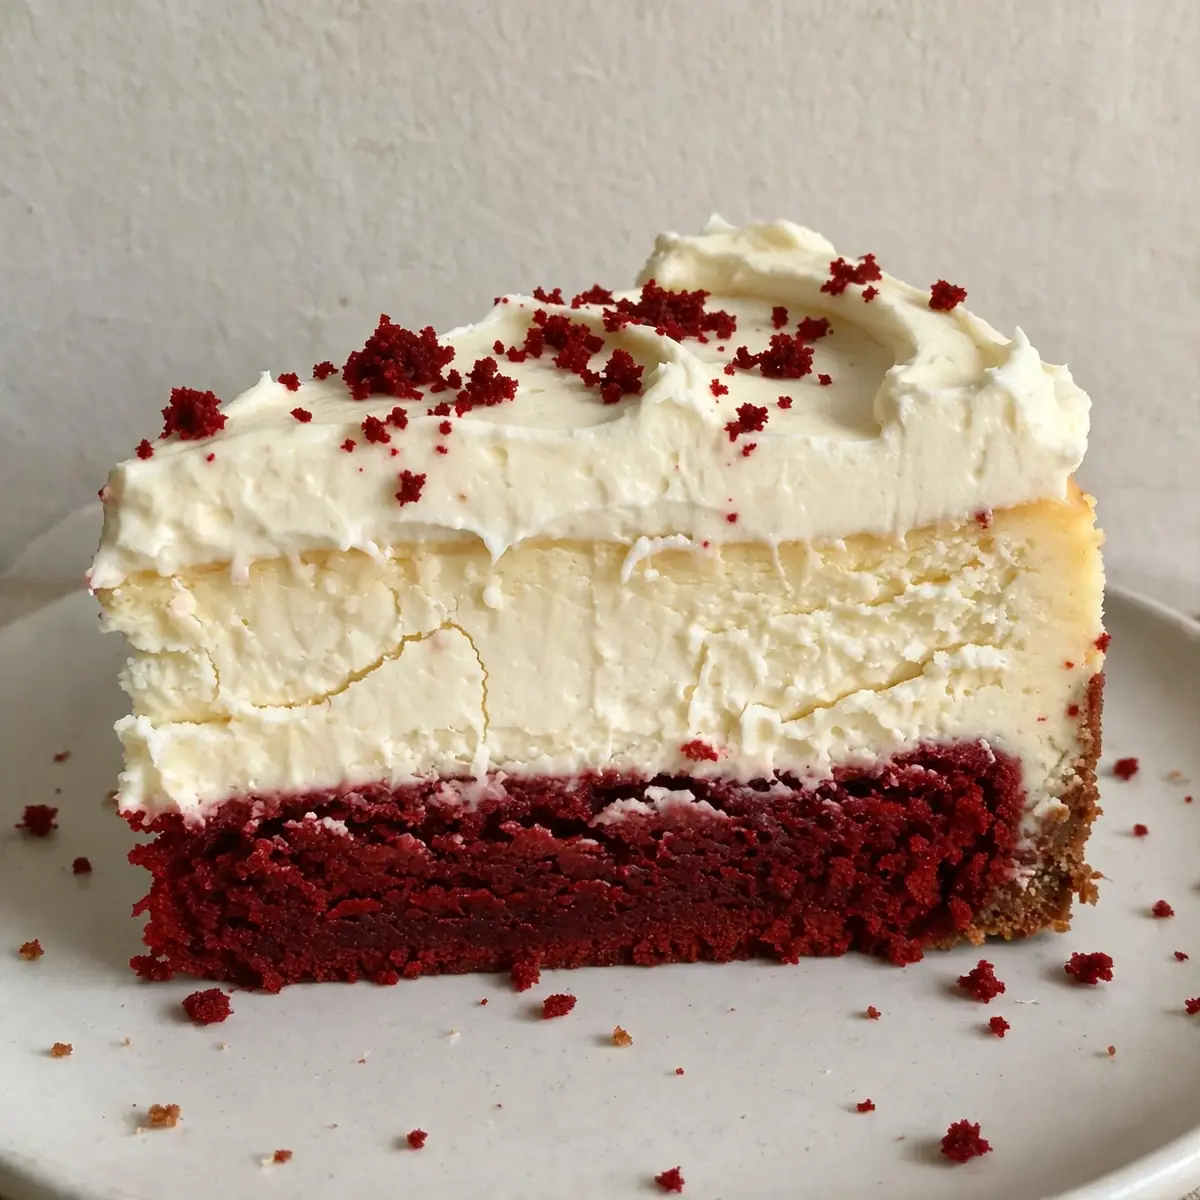
- Layer the cheesecake: Pour the red velvet batter over the cooled biscuit base and spread it evenly with a spatula. The batter should reach about halfway up the sides of the tin. Gently spoon the cheesecake filling on top of the red velvet layer, starting from the edges and working towards the centre so the layers don't mix. Use a knife to swirl the two batters together very gently — just three or four figure-eight motions — to create a marbled effect. The surface should look like a painter's palette, with red and cream ribbons swirling together.
- Bake in a water bath: Wrap the outside of the springform tin tightly with two layers of foil, ensuring no seams are exposed where water could seep in. Place the tin in a larger roasting tray and pour boiling water into the tray until it reaches halfway up the sides of the springform tin. The water should be steaming gently, not bubbling. Bake for 50–55 minutes. The cheesecake is ready when the edges look set and slightly puffed, but the centre still wobbles like jelly when you gently shake the tin. The surface should be pale gold with no cracks, and the kitchen should smell of warm cocoa and creamy vanilla.
- Cool and chill: Turn the oven off and leave the cheesecake inside with the door slightly ajar for 1 hour — this gentle cooling prevents the top from cracking. Remove the cheesecake from the water bath, take off the foil, and let it cool completely on a wire rack at room temperature. You'll hear it settle as it cools, and the surface will firm up slightly. Once cool, cover with cling film and refrigerate for at least 4 hours, though overnight is best. My husband, who's usually picky, asked for seconds when I served this after a full 24 hours of chilling.
Notes
Ensure all dairy ingredients (cream cheese, eggs, buttermilk) are at room temperature for a smooth, lump-free batter. Baking in a water bath is crucial for preventing cracks and achieving a creamy consistency. Allowing ample chilling time (preferably overnight) significantly improves the texture and flavor.